
How to host and deploy (Next.js) applications on cloudflare
Hosting next.js application on cloudflare instead of Vercel.

I wanted to build a personal website and decided to host it on Cloudflare. Here are the steps, assuming you already have your Next.js application ready to be deployed.
First, install the @cloudflare/next-on-pages adapter:
npm install — save-dev @cloudflare/next-on-pages
2. Configure the server-rendered route to use ‘Edge’ runtime
By default, Next.js has two runtimes — “edge” and Node.js. You can only used “edge” runtime on cloudflare currently.
Add this to your layout.js or _app.js.
export const runtime = “edge”;
3. Update package.json and add commands to build on cloudflare:
“pages:build”: “npx @cloudflare/next-on-pages”,
Your package.json should look something like this:
{
  "name": "website",
  "version": "0.1.0",
  "private": true,
  "scripts": {
    "dev": "next dev",
    "build": "next build",
    "start": "next start",
    "lint": "next lint",
    "pages:build": "npx @cloudflare/next-on-pages",
    "preview": "npm run pages:build",
    "deploy": "npm run pages:build"
  },
  "dependencies": {
    "react": "^18",
    "react-dom": "^18",
  },
  "devDependencies": {
    "@cloudflare/next-on-pages": "^1.13.2",
    "@types/node": "^20",
    "@types/react": "^18",
    "@types/react-dom": "^18",
    "typescript": "^5"
  }
}
4. Deploy app to cloudflare
You can either deploy using the command line, or connect to your github account and repo on cloudflare. I chose the latter.
If you decide to deploy using the command line, run the command below:
npm run deploy
For me, I set up using the cloudflare dashboard. Login and Under ‘Workers & Pages’, select the ‘Pages’ tab.
When you are on the pages tab, you will see a “connect to Git” button. Click on that and select the repository and branch you would like to deploy and select “Begin setup”.


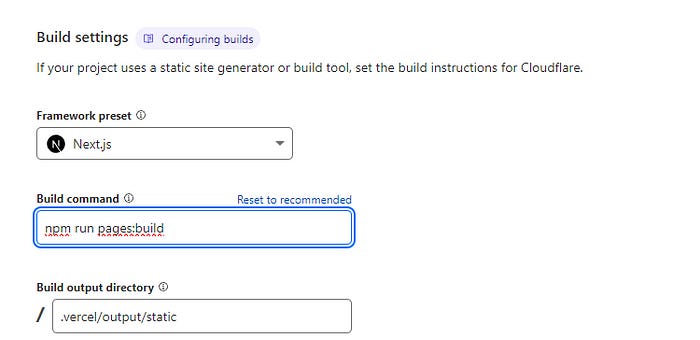
After selecting the branch, scroll down to the build settings.
Select “Next.js” under the Framework project
Type “npm run pages:build” in the build command
Keep the build output directory as it is (.vercel/output/static)
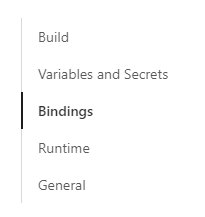
One last thing: to enable both built-in runtime APIs and polyfills for your application, you must add the “nodejs_compat” compatibility flag in the settings.

Try deploying now, you should see a similar view like this:

If all is good, congratulations! Your app is deployed!

Optional:
If you want to use a custom domain, go to the “custom domains” tab to set it up. You can add a subdomain or root domain. If you are using cloudflare as your DNS provider, you can click on the “verify DNS configuration” to automatically add the records.
Note:
You might have to make use of the cloudflare R2 to store your metadata or objects as they might not be available in the public/assets folder upon deployment
Recommended articles and links to consider: